Thursday, May 27, 2010

Baby Food Jar Crafts


 If you are visiting from Great Day St. Louis, thanks and welcome!  I had a great time sharing these crafts this morning and I want to give you the full tutorials as well as links to where some of these great ideas started.

Seedling Jars


Click here for this "how-to" post on making seedling jars.

Tealight Holders


 The idea for making these baby food jar tea lights came from the wonderfully lovely blog, www.prudentbaby.com.  I used the same concept, but I secure and seal the fabric with mod podge. 

Tea Light Holders
Baby Food Jars
Fabric Strips
Ribbon/Twine/Contrasting Fabric/Embellishments/Etc
Pinking Sheers
Mod Podge
Tea lights

1. Cut strips of fabric to cover the flat part of each baby food jar using pinking sheers.
2. Using matte mod podge, adhere the fabric strips to the surface, let each jar dry, and then seal them with more podge.
3. After completely dry, place your tea light and enjoy!


4. For a hanging tea light, use strong, yet flexible wire, and wrap around the jar lid lip.  Then, wrap another piece of wire around the top of the jar to create a hanging loop. 

Memory Game 


This is my favorite idea! After using the jars for projects, I had a large stack of lids that I've been giving my kiddo to play with.  Then, it dawned put some pictures in there--not a genius idea, but fun nevertheless! I love the fact that you can interchange the pictures to suit your child's interests, I love that it is cheap and easy, and I love that it is transportable!

Memory Game with Baby Food Jar Lids
At least 10 Baby Food Jar Lids
A set of shapes, icons, etc. that are toddler-friendly
Scissors
Glue or Tape

1. Using clip art or photoshop, create pairs of shapes easily identifiable by toddlers
or use mine.
Photobucket
2. Cut out each circle inside the black line (you may have to do a little extra trimming) and glue to the underside of your baby food jar lids.
3. After drying, have fun playing! This game is compact and travels well and as your child tires of the same pictures you can replace them with new ones!

Pin Cushion


How adorable right?
You can also find this idea at Prudent Baby, but I used the method from My Nifty Needle to make mine. 

Pin Cushion
One Baby Food Jar and Lid
Ribbon
Poly-Fil
Hot Glue Gun/Glue
Fabric (cut into a 7in diameter circle)
Needle/Thread

1. Using a basic running stitch, stitch around the circle approximately .5-.75 inch from the edge.
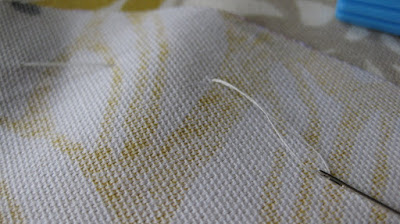
2. Pull your threads to create a little sack then push in a small amount of filling to create a little cushion.  Pull the threads tight to create a ball and tie off the ends.  Push to flatten the edges so that the bottom of the puff can be hot glued to the top of the lid.

3. Using your hot glue gun, apply a generous amount of glue to the top of the lid and hold your cushion down until glue is dry.
4. Using your ribbon, glue it around the edge of the lid to hid the cushion bottom and lid edges.
5. Put your miscellaneous pins in the jar and a few on top for a functional pin cushion!

Well, now you have four great crafty reasons to save your baby food jars and re-purpose them into something fun and functional!

*Don't forget to enter this week's giveaway from the Book Bound Bindery!*

Today I'm Linking up at Strut Your Stuff at Somewhat Simple

Baby Food Jar Crafts on Great Day St. Louis


This morning I will be back on Great Day St. Louis to showcase a variety of fun and useful crafts ( to re-purpose baby food jars (including this one).  It seems that many moms have a hard time tossing or recycling these cute tiny jars; so, we always have a few around the house.  If that description fits you or even if you just save your empty jelly jars, check me out at 10am CST on KMOV Channel 4 or online for some functional and simple projects.

Also, check back later today for details, photos and links on each baby food jar project. 

Wednesday, May 26, 2010

Wednesday Giveaway from the Book Bound Bindery


I have to say that the best part about blogging is how it has led me to so many talented, creative and wonderful women.  

Sarah Nielsen not only has a wonderfully cool etsy shop, the Book Bound Bindery, she also has a lovely blog where she posts great tutorials, Sarah Nielsen-The Lightbulb Lab

To me, Sarah is keeping alive a lost art--handmade books and, in turn, hand-writing. 

I love the idea of giving a friend one of Book Bound's hardbound journals as a first baby shower gift--what a classically sentimental place to record baby's firsts and mom's thoughts. Similarly, what is a more romantic heirloom than a handmade personalized guest book for your wedding? If your answer is nothing, well, Sarah makes those too.

I also love the little paperback books--I think they are perfect place for your kiddo to keep his/her doodles and notes from their early school days.  I love the idea of treasuring my kiddo's scribbles in a "made with love" notebook.

 Which brings me to...

the giveaway
One paperback notebook (choose dino, truck, butterfly, or bird)
&
One set of coordinating stickers 

to win
1. Comment on this post with the notebook you would pick if you are the lucky winner!
2. For one extra entry, become a fan of the30girl on facebook. 
3. For one extra entry, become a follower of the30girl.
4. For three extra entries, blog about my giveaway!
Please leave a separate comment for each entry and your email address(just on one comment) so I can contact you if you win!

This giveaway is open until Tuesday, June 1st at 11:59pm CST.  The winner will be selected using random.org and I will announce her/him on the30girl on Wednesday, June 2nd.  I will contact the winner via email.  Thanks for entering a 30girl giveaway! Good luck and have fun!

The products in this giveaway were provided free of charge by the Book Bound Bindery. The above opinions are my own and not influenced by any other party.

bee words of wisdom


I wanted to add some "words of wisdom" to my son's playroom.

To do that, I recently purchased some 2/$1 document frames from Deals and painted them white.  They are cheap, but they work great in a playroom where things are likely to be knocked off the wall from time to time.  I hung them using Command Picture Strips--try them, they work and are great for the indecisive decorator. 


I need to do a little trimming to smooth out the edges, but overall I'm pleased with how this $2 project turned out. Now, my kiddo need only to learn to read in order to get some of his Mommy's words to live by.

If you would like to make some "bee words of wisdom" for your child's room or playroom, send me an email and would be happy to email you the jpegs.  Just please don't reproduce them for sale, but do spread the word where found them.:)
Parties I'm Linking To Today: 
Penny Pinching Party from TheThirftyHome
Whatever Goes Wednesday from Someday Crafts
Be Inspired at Room To Inspire

Monday, May 24, 2010

A dry erase menu...

After seeing this post from a wonderfully craft blogger, Stephanie Lynn of Under the Table and Dreaming, I was inspired to create a menu of my own from a shadow box picture frame and some of the products recently gifted to me by EK Success Brands.  


&
&
This fun edger (that I already used here)
These products have really inspired me to do more paper-crafting...

I'm happy with how this little craft turned out, especially, since it took no time at all and is quite functional, in my opinion. 
I'm hoping this little menu will inspire me to actually plan my weekly meals more thoughtfully and to actually stick to a schedule.  We'll see.

Happy Monday!

Parties I'm Linking To: 
Made By You Monday at Skip To My Lou
Just Something I Whipped Up at The Girl Creative
Making the World Cuter Monday at Making the Work Cuter

Thursday, May 20, 2010

some spring thrift finds...


solid wood, made in italy $8.00
a nice tiny lamp table.


wood, made in the Philippines, $7.00/pair
these might get a coat of paint...


clay bowl, $11.00
for fruit and such.


iron wire tier, $15.00
can't wait to fill this with tiny vases full of fresh flowers.


cool white wooden wall shelfs, $2.00 each at a garage sale
wish i could decide where to hang these.


two bent wood chairs with cane seats (one needs repair), $7.00/pair
i think one will soon have a home at the kitchen desk with a little cushion.

a medium-sized, vintage butter crock, $11.00
currently used to hide toys on the fireplace.

Eventually, I will paint the little table and I'm already in the process of painting and repairing the chairs.  I'm not sure where everything will find a "permanent" spot in our home yet, but I will let you know when I do. 
All of these items where found at local thrift stores around my home in St. Charles, MO or at local garage sales.  If you are in the area, drop me a note and I will let you know where I find all my goodies!

what i wore...last week.


yes, i'm over 30 and wearing jeggings. judge me not, these are comfortable little buggers and actually more flattering than you might think.  from the back, i look "lifted" if you know what i mean.

i wore this outfit for my 5.5 hour sojourn for work last week. 


my theme for work outfits last week was "menswear inspired" combined with "shop my closet". since i don't actually "go" to work very often, i can't quite justify purchasing work clothes at this point in my life.

the best part about this outfit is...the pants. i haven't fit into them since graduate school. a big thanks goes out to my son for his high activity level.


same menswear concept here. i'm proud of my light packing by coordinating shoes and accessories for the week. i love the pants in this outfit, especially their price-$7 from LOFT on clearance this past winter.

how about you...what do you think of menswear inspired looks? any favorite ways to incorporate "boy style" into your look?

p.s. i just got my haircut last night...no more long locks.

Wednesday, May 19, 2010

and the winner is...


Tuesday, May 18, 2010

chalkboard canvases

good morning. i think i have finally recovered from a wild week of work and i'm ready to end my blogging hiatus. thank goodness because i've really been missing it!

you may have seen this post where i made a chalkboard and tin-can telephones for a tiny guy's birthday present. well, i went a little wild making chalkboard canvases.  

i was inspired by the chalkboard panels from pottery barn.


i wanted to make something similar for a large empty wall in my kitchen for less than pb's $34 per panel.  I bought 4 2pks of 11x14 canvases at Michael's for around $11 when they were buy one get one a couple of weeks ago.  At less than $2 per chalkboard, I can even afford to change my mind next month:)
well, this is what i ended up with.  what do you think?  i love the idea of being able to change the phrases and images as often as i like; plus, i can use them for notes and messages.  it was a quick, easy, and inexpensive fix for a wall in desperate need of attention.  

making these canvases was as easy as three coats of rustoleum chalkboard paint with a foam roller; followed by three days of drying, conditioning with chalk, and hanging with 3M picture strips and a laser level. 

 *don't forget to enter this week's giveaway of t-shirt yarn from Elcectic Notions ending tonight at 11:59pm!*

Parties I'm Linking To Today:
Just Something I Whipped Up at The Girl Creative
DIY Day at A Soft Place To Land
Get Your Craft On at Today's Creative Blog


Thursday, May 13, 2010

Wednesday Giveaway, one day late.

Hello readers! I'm not going to bore you with the "I'm sorry for not posting in so long post."; so, I'm just going to say I've missed you and I'm glad to be back at it.  


So, without further ado, I would like to introduce this week's giveaway.  As you know, from here, here and here, I'm a big fan of using the t-shirt yarn from Eclectic Notions to make comfy, stylish jewelry.  But, this great recycled craft material is useful for so many other projects from adorning plain t-shirts j-crew style to making fun summer scarves.  The possibilities are endless. 

Not only is recycled t-shirt yarn great working material, Bridget from Eclectic Notions provides an overall amazing customer experience.  From delicate packaging adorned with handmade bottle cap magnets to shipping cost refunds (when the cost is less than that charged), you feel like you've just ordered from a friend, which is simply swell.

 now that brings me to...

the giveaway
Eclectic Notions is generously offering...

3 balls of Recycled T-Shirt Yarn in the colors of your choice!

to win
1. Comment on this post with the colors you would pick if you are the lucky winner!
2. For one extra entry, become a fan of the30girl on facebook. 
3. For one extra entry, become a follower of the30girl.
4. For three extra entries, blog about my giveaway!
Please leave a separate comment for each entry and your email address(just on one comment) so I can contact you if you win!

This giveaway is open until Tuesday, May 18th at 11:59pm CST.  The winner will be selected using random.org and I will announce her/him on the30girl on Wednesday, May 19th.  I will contact the winner via email.  Thanks for entering a 30girl giveaway! Good luck and have fun!

The products in this giveaway were provided free of charge by Eclectic Notions. The above opinions are my own and not influenced by any other party.

Thursday, May 6, 2010

Fabric Flower Tutorial on Great Day St. Louis!


 This morning I was very fortunate to be invited back to Great Day St. Louis to give a brief tutorial on making fabric flowers, particularly the ones you can find here and here

If you are so inclined, you can check me out here.

Thanks for watching and have a great day!

Wednesday, May 5, 2010

HAPPYBABY giveaway winner


*For all you crafty readers out there, come back next Wednesday for an stupendous giveaway of t-shirt yarn from Eclectic Notions; you can see my t-shirt yarn creations here and here.*

animal, vegetable, cookie.

Have you read this book?
 If not, check it out here. 

I know I'm a bit late in actually getting around to reading this, but, that said, this is definitely a lifestyle-changing book.  Whether you simply frequent your local farmers' market or build a large-scale garden in your backyard along with a do-it-yourself chicken coup, this book will change your thoughts about food, where you get it and how you eat it.  

I'm still reading, but, of course, I did happen to get a chance to make the book's zucchini chocolate chip cookie recipe.  I couldn't pass up the chance to actually get the kiddo to eat zucchini, right?  Plus, I'm always looking for any excuse to have some cookies on hand for late-night snacking.  It's a weakness. 

You want some now, don't you?

Tips, or not: 
1) If you want these cookies to be super fluffy and cake-like, you can accidentally add another 1/2 tsp of baking soda like I did.
2) Don't add 1TBSP of vanilla like the recipe calls for; it's probably a misprint.  I added 1-2 tsp.
3. You can use dark chocolate chips; like Ghirardelli 60% cacao...more antioxidants, better flavor.
4. Share one with your kiddo and think "we're eating vegetables. these cookies are healthy."
Related Posts with Thumbnails